
Tight or Cranky Hamstrings with Pickleball, Lifting, or Running? Try This Warm-Up!
5 MINUTE READ

By: Dr. Jerry Yoo
CEO & Founder, Next Level Physio
Watch the video:
If you’re a pickleballer, group fitness “classer”, or runner over 30 and your hamstrings always feel tight or cranky, this one’s for you.
After dealing with my own first-ever hamstring injury a few months ago because I didn’t warm up properly (don’t judge!) I completely changed how I prepare my legs before workouts.
Since then, adding isometric holds to my dynamic warm-ups has been a game changer.
Static stretching before activity reduces muscle readiness.
Isometric activation improves it.

Most lifelong athletes I meet still think stretching makes them more “ready” to move. In reality, static stretching can reduce force output and delay muscle response time, especially problematic if you’re over 30.
Isometric activation, on the other hand, increases tendon stiffness, boosts muscle recruitment, and improves joint stability, which can help you move stronger and safer.

Before jumping into the exercises, it’s critical to understand the concept of the tripod foot. This simple cue can make or break your movement quality, especially when it comes to activating the hamstrings and glutes efficiently.
The tripod foot refers to maintaining three points of contact with the ground:
The base of your big toe
The base of your little toe
The center of your heel
These three points create a stable base through the gait cycle that allows your foot to transfer force through the ground efficiently, which helps:
Engage your posterior chain (hamstrings and glutes) more effectively.
Align your joints from the foot up through the hip.
Prevent over-reliance on the toes or heels, which can cause instability and inefficient loading.
You’ll apply the tripod foot principle throughout Exercises 1, 3, and 4—to stay grounded, balanced, and properly activated.
1. Foot-on-Wall Foot Pulls
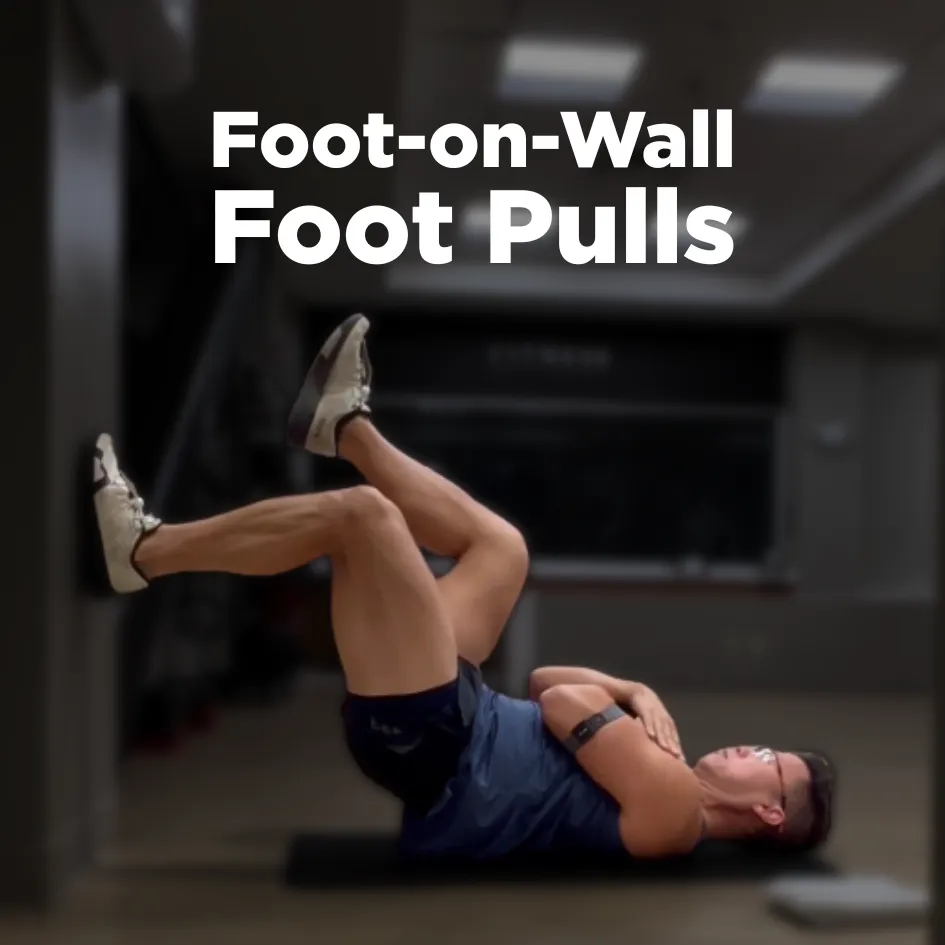
Reps: 3–5x each side
Hold: 30–60 seconds
How to do it:
Lie down about a foot away from a wall.
Place one foot lightly on the wall with knees and hips at 90 degrees.
Keeping your hips level, gently pull your heel down—without actually moving it.
Maintain tripod foot pressure on the foot that’s on the wall.
You should feel your hamstring tighten and your glute engage.
Form tips:
Keep your ribs down and core tight.
Stay tall—don’t lean or rotate.
Focus on tension, not motion.
2. Glute Bridge Walkouts
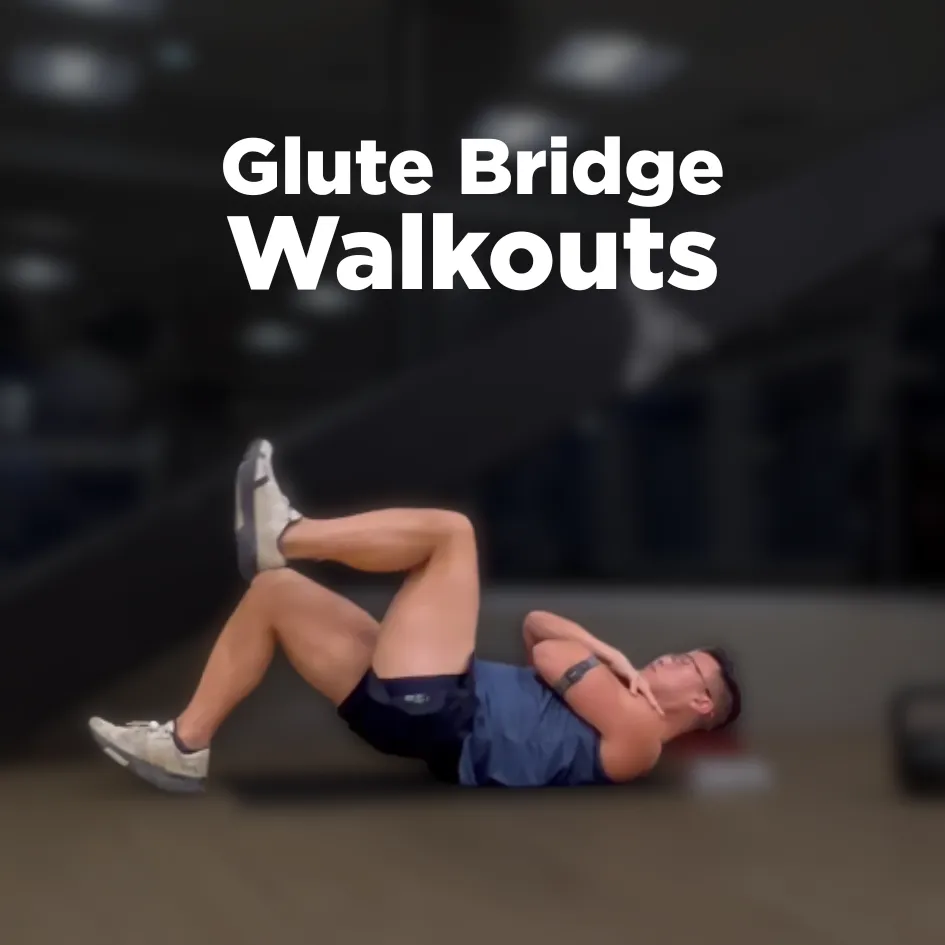
Sets: 3
Duration: 1 minute
How to do it:
Lie on your back with knees bent and feet hip-width apart.
Lift your hips so your body forms a straight line from shoulders to knees.
Slowly walk your heels out, one small step at a time, keeping your hips level.
When your hamstrings light up, walk your feet back in.
Form tips:
Maintain a neutral spine, don’t arch.
Move with control, not speed.
If your hamstrings cramp, shorten your range and refocus on control.
3. Split-Stance Good Mornings
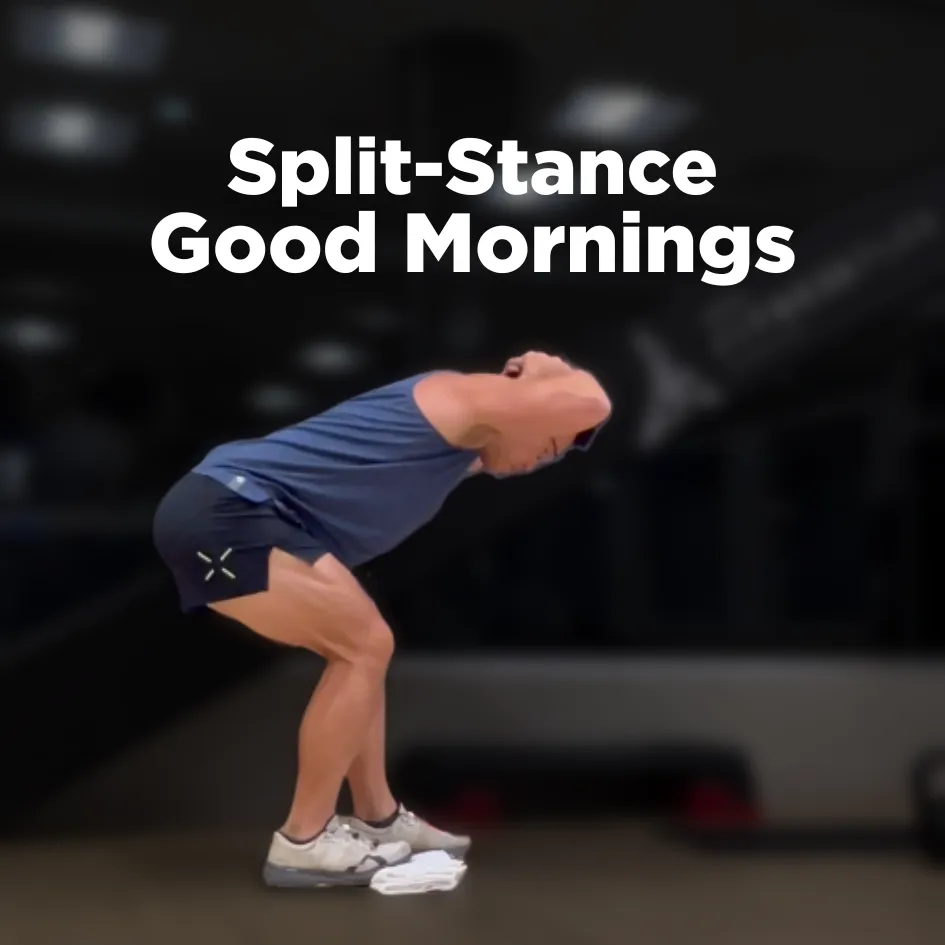
Reps: 5–10x each side
Hold: 5–10 seconds
(Adapted from Dr. Michael Camporini’s “Campo Deadlift”)
How to do it:
Stand with feet in a staggered stance—front foot flat, back toes slightly lifted.
Place your hands behind your head, chest proud.
Hinge from the hips, loading the front leg while maintaining tripod foot contact: big toe, little toe, and inner heel evenly pressed.
Keep your spine long and hips square.
Hold the bottom for 5–10 seconds, then return to start.
Form tips:
Keep your chest up and back flat.
Feel the tension in your front hamstring and glute.
Keep breathing throughout.
4. Kettlebell RDL Walks

Reps: 8–10 steps each side
Hold: 5–10 seconds per step
How to do it:
Grab a light to moderate kettlebell (around 25–30% of your body weight).
Hold it in one hand, aligned with your shoulder and front shin.
Step forward into a single-leg RDL, sending your hips back (not down).
Maintain tripod foot pressure through the front foot—don’t collapse the arch or roll onto your toes.
Keep your front shin vertical and spine neutral.
Pause at the bottom before moving to the next step.
Form tips:
Brace your core and keep shoulders level.
Feel the tension high in your hamstring and glute.
Move deliberately—quality over speed.

You don’t need to feel loose before activity, but you do want to feel primed.
This quick sequence will make your hamstrings feel stable, strong, and primed for action, whether you’re running, lifting, or playing pickleball.
PS-> None of these exercises should be painful.
If they are, stop and talk to your physio—or schedule a free hamstring assessment at one of our Next Level Physio locations.
Finding this info helpful? Send me a quick thumbs up or question here: jerry@nlphysio.com
And if you’re looking for more ways to break through plateaus, protect your mental edge, and bring joy back to your runs, explore our expert videos and strategies on our YouTube Channel and connect with us on social for daily tips and inspiration:
Next Level Physio
Dr. Jerry Yoo
Sincerely,
Dr. Jerry Yoo
About the Author
Dr. Jerry Yoo is the Founder of Next Level Physio.
He has worked with runners and triathletes for over 25 years, and is a clinical running research partner with Rutgers University, Dr. Jerry is an expert at helping athletic men and women over 30 get back to what they love to do.
He can be reached directly at
Post Address and Mail
Email: info@nlphysio.com
Address
Office: 1055 Darrington Drive
Cary, NC 27513
Get In Touch
Hours
Mon to Fri: 8:00am-6:00 pm
Sat to Sun – CLOSED
Phone Number:
919-650-4633

Facebook
Instagram
Youtube
Website